Third Generation Chassis Installation - Part 2")
Posted by jiggad369 - Acurazine on Apr 25th 2018
Acura TL (2004-2008) Third Generation Chassis Installation - Part 2
Source: Acurazine
This was on my to-do list ever since last year but weather and work did not permit me to do this until today.
This was definitely more difficult than I thought. Doing it by yourself is twice as painstaking but do able.
The bars are 4-point so it connects from the front of the side frame to the rear. I'm not going to go into technical details but they do make a difference. Some refer to it as Subframe Connectors also.
Anyways, onto the install.
Disclaimer: Please take all safety precautions and do not hurry. Take your time. Any damage you do is your responsibility so be careful!
I did this by myself so I the instructions will follows as such but I HIGHLY recommend another set ofhands.
*I would advise doing this either without jacking up the car, putting the car onto four leveled jackstands, or on a lift. Whenever I'm working doing frame or suspension work, I like to keep my car as level as possible.
1. Here are the bars along with the hardware. This does not come with any instructions or manual so I have done all the hard work for you guys and determined the best way to install it on a 3G.
Note: If you look in the middle of the pic., you'll see a two bolt "bracket". This kit is made for a Honda and we cannot use the two bolt bracket. Long story short, you'll have to cut it in two.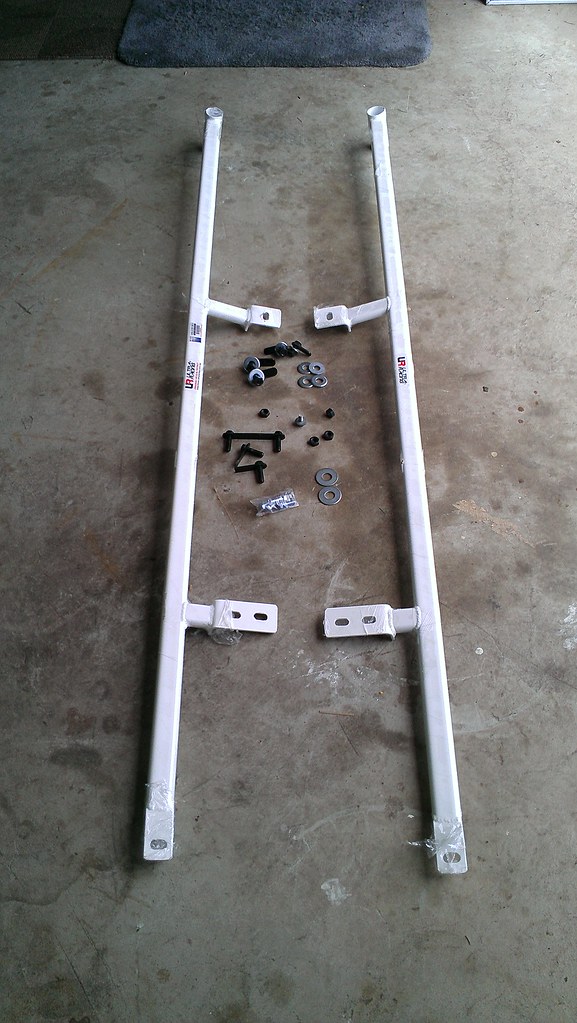
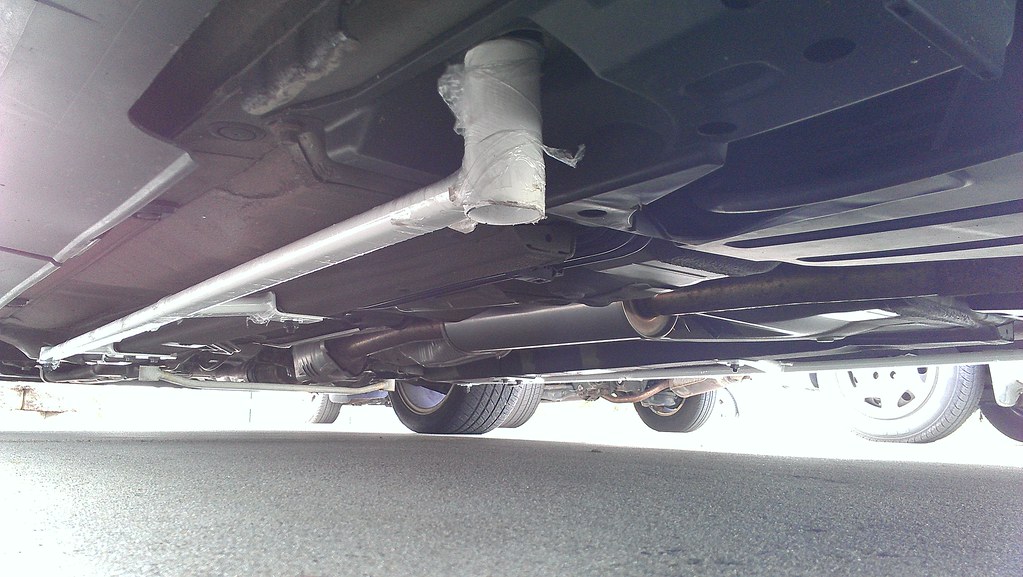
2. Once, you get underneath the car, you'll see that the underbody has holes which are "plugged" with these rubber caps. The front of the brace will attach to the outer hole in this pic. (outside of the front subframe).
Remove the outer most cap.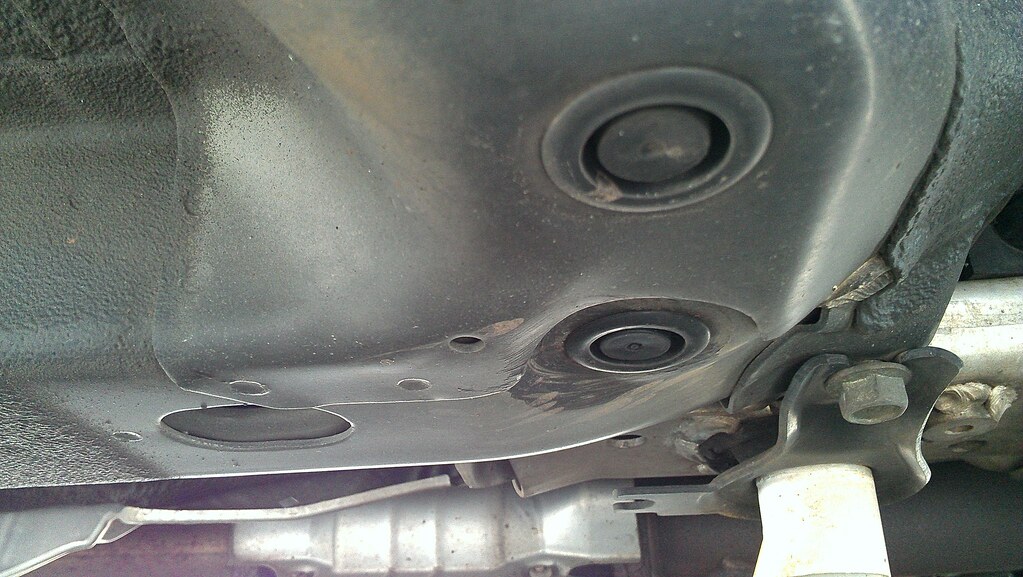
2. Go ahead and remove the two 12MM bolts in the mid section and the big cap at the bottom left in this pic.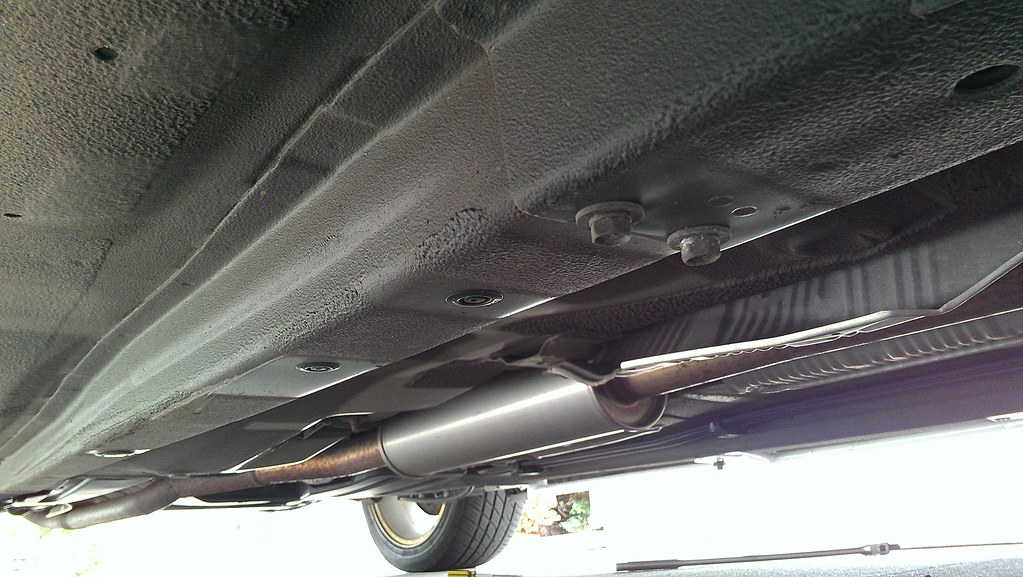
3. Locate the rear (final) mounting location. It is the oval hole by the rear wheels.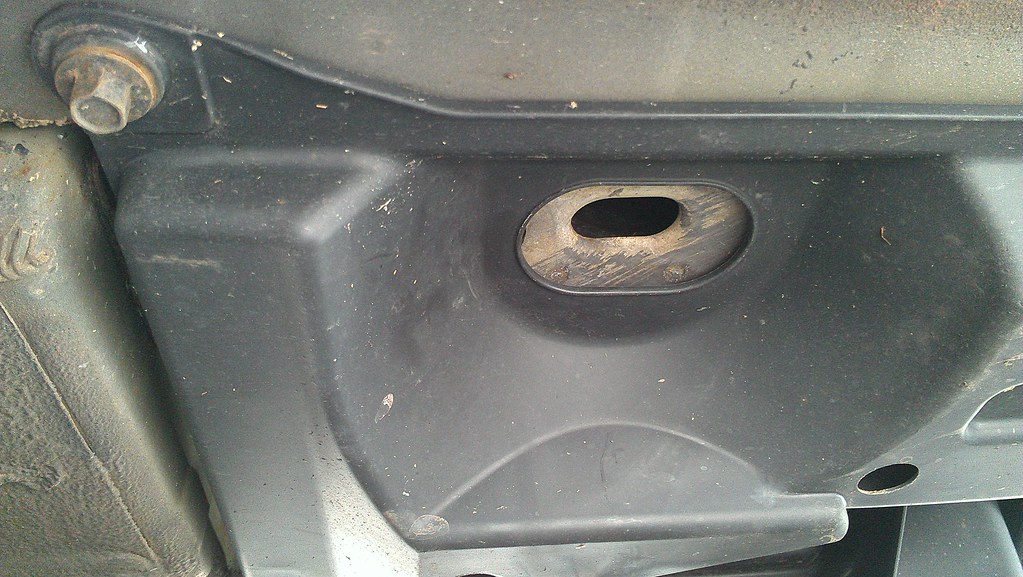
4. Now that you know the mounting locations, you need to go ahead and insert the brackets into the holes. You basically slip them in. 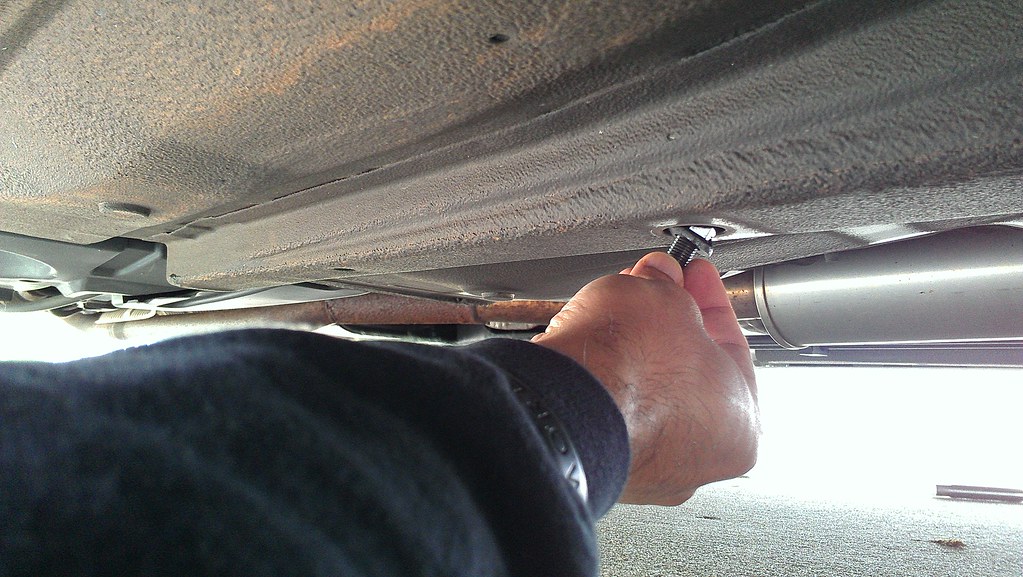
5. Once you have all of the brackets in place, you're ready to start bolting up the brace. This part is very tricky and it took me hours trying to figure out the best to mount it without knocking the brackets out of the holes.
The first bracket you want to bolt up (thread by hand) is the front most. Use the big washer and a 17MM bolt to "hang" the brace. Move to the second hole (third mounting location on the brace) and carefully threa the bolt with your hand (using a finger to hold the bracket. Then being very careful, bolt up the two 12MM bolts you removed earlier. Make sure the other brackets are still in their holes! By now the brace should be hanging onto the first three mounting locations with brackets still being in place. Check all of them again to be sure because the next part is VERY tricky and if you finish the fourth mounting location and if any of the other two brackets slide out, you'll have to start all over. If all is well, go ahead and use a SMALL ratchet to tighten the first three mounting locations.
Move to the fourth and final mounting location. The best way to tackle this location is to hold the bracket with something (finger, screwdriver) and carefully using a small 17MM socket, put the bolt into the socket and then the washer on top of that. Now carefully thread the bolt onto the bracket making sure the bolt and the washer are both secure. This part will take the most time because of the difficulty of holding the bracket in place while you thread on the bolt and washer. Once it's threaded, use the small ratchet to bolt everything on.
Once all four mounting location are secure, carefully inspect all three bracket locations to make sure the bracket has not slid out and it's holding onto the other side of the frame well. Once all is confirmed, go ahead and torque to 36 lb/ft**.
**I cannot confirm if this the correct spec as I cannot find any torque specs for the two 12MM bolts but I took the safe route and went with a safe spec.
6. Move onto the other side and repeat steps 2-5.